Installation Guide
GRAPHIC KIT INSTALLATION
PREP (If plastic is used)
1. Remove all existing decals and adhesive left behind
2. To insure that all old adhesive is removed, use contact cleaner or decal remover like Goo Gone®.
3. Let plastic dry after cleaners are used.
4. Clean plastic with a water-based cleaner like glass cleaner to remove any residue from contact cleaner or decal remover.
5. Wipe with a clean lint-free cloth.
PREP (If plastic is new)
1. Clean plastic with a contact cleaner or decal remover like Goo Gone®to remove any oils. New plastics come with a protective silicone coating which must be removed.
2. Let plastic dry after cleaners are used.
3. Clean plastic with a water-based cleaner like glass cleaner to remove any residue from contact cleaner or decal remover.
Note: Make sure you are in a well ventilated area and wear protective clothing and safety goggles while using any cleaners
Application
Be sure to wash hands thoroughly to remove any excess oil from fingertips. Install at room temperature to make application easier. For colder environments and easier manipulation, carefully apply light heat using a blow dryer. Keep tip of heat source at least 6-8 inches away from decal at all times. The goal is to only soften the decal to make it easier to apply. CAUTION: DO NOT OVERHEAT VINYL.
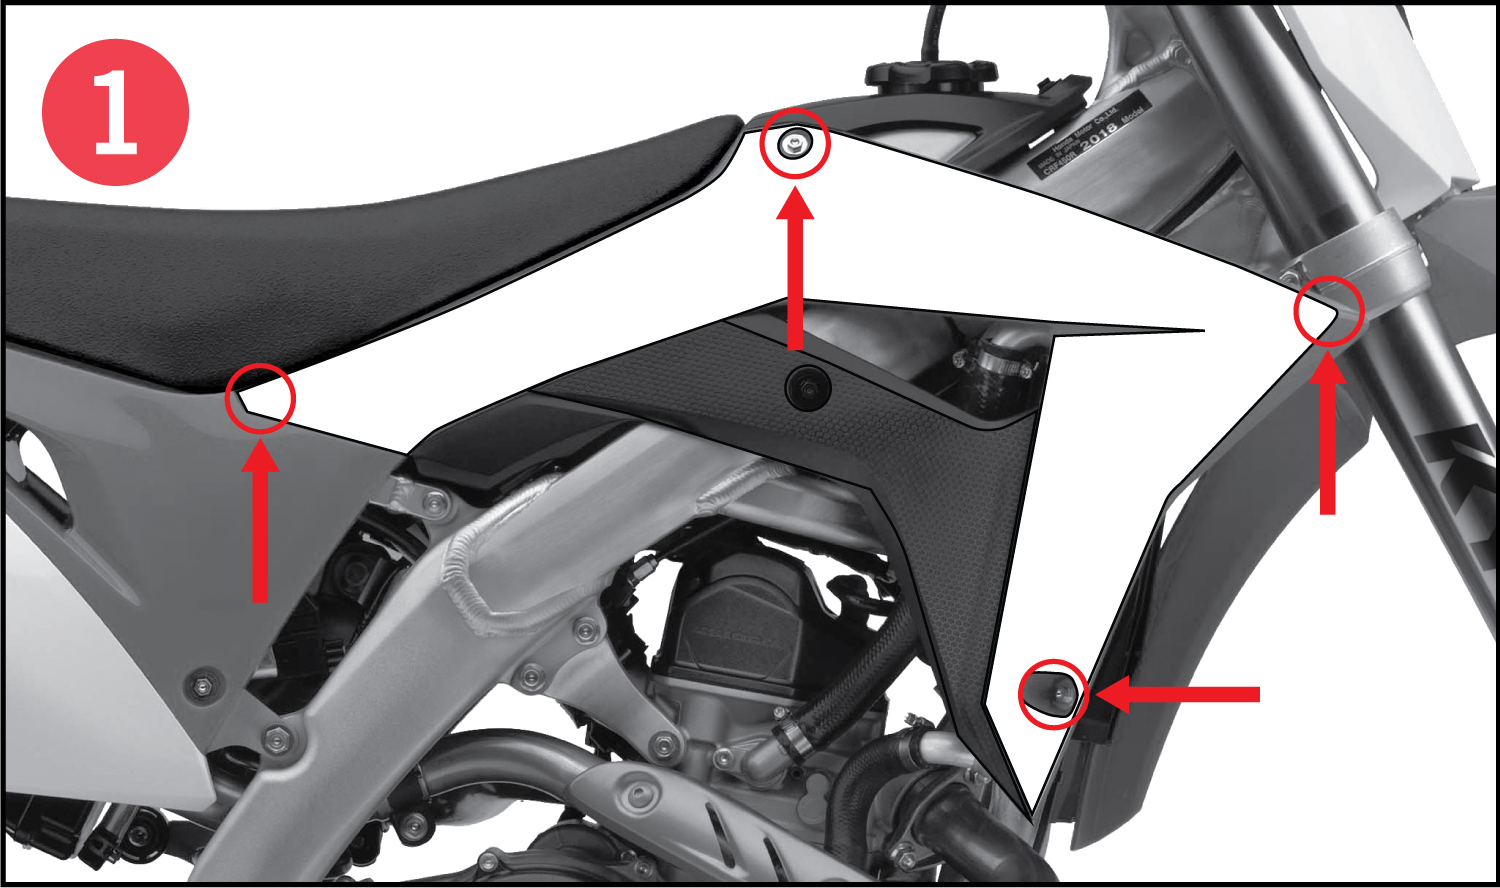
Remove the decals backing paper. Position the decal by aligning a front and rear point along with one top or bottom bolt hole.
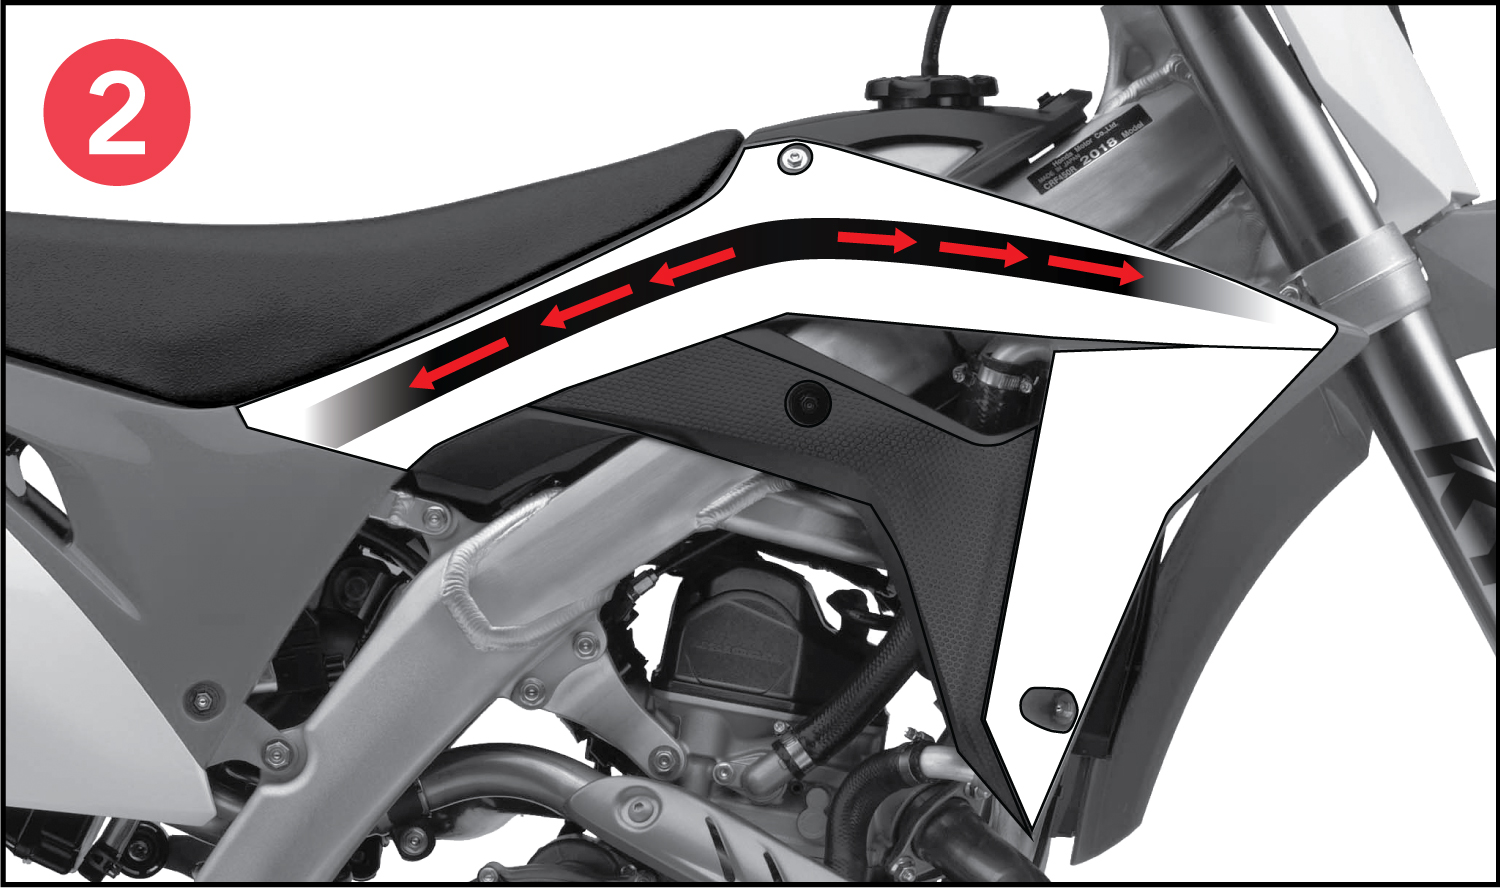
Once aligned, press down the middle of the decal with fingers. Work from center outward, making sure the top and bottom portions stay unapplied.
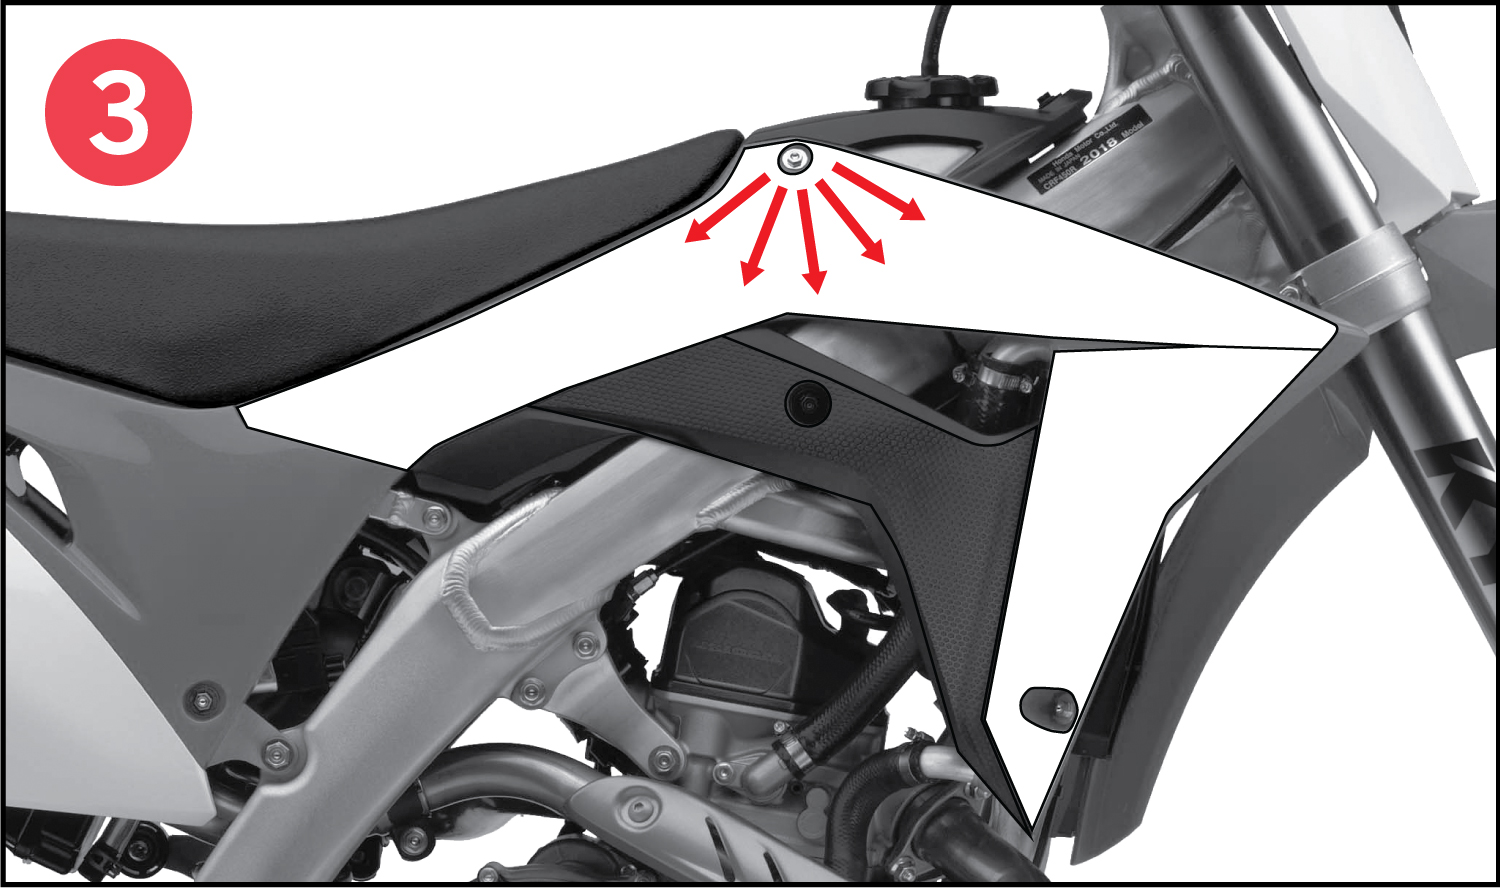
Next, apply the top portion of the decal by evenly pushing from the top center down with your fingers. Push down and out in small increments to prevent the material from bunching up in one area. If necessary, use light heat to soften/relax the material to avoid wrinkles.
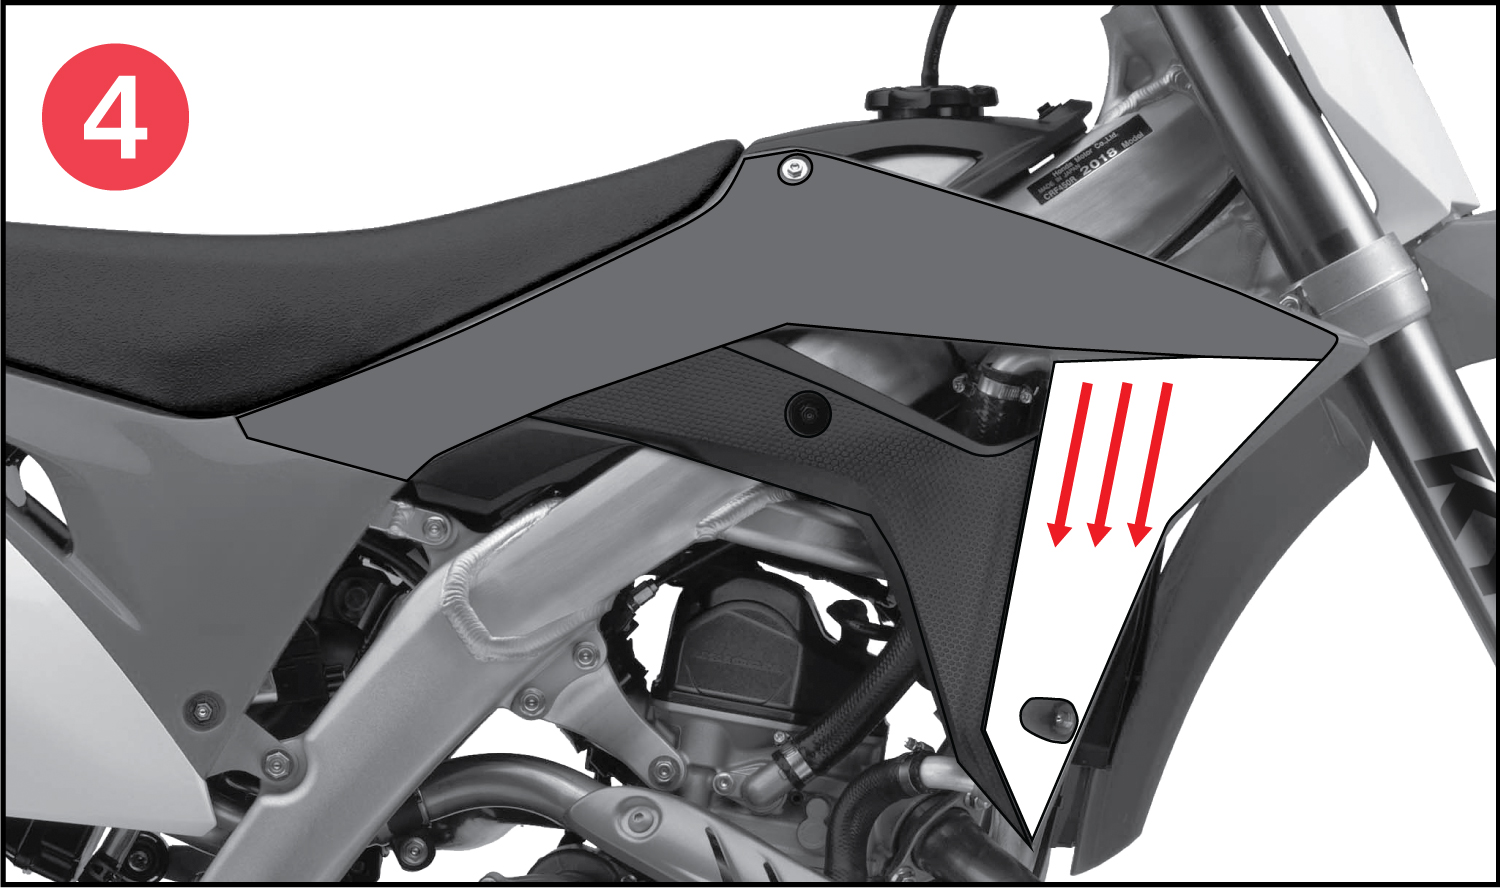
Next, apply the bottom portion of the decal by evenly pushing from the top center down with your fingers. Push down and out in small increments to prevent the material from bunching up in one area. If necessary, use light heat to soften/relax the material to avoid wrinkles.

If any areas need adjustment, simply pull that area up and re-apply to your liking. The material is made to be adjusted and the adhesive will reach full strength after 48 hours. Once all pieces are installed to your liking, firmly press down all edges while applying light heat along the edges for long-lasting adhesion.
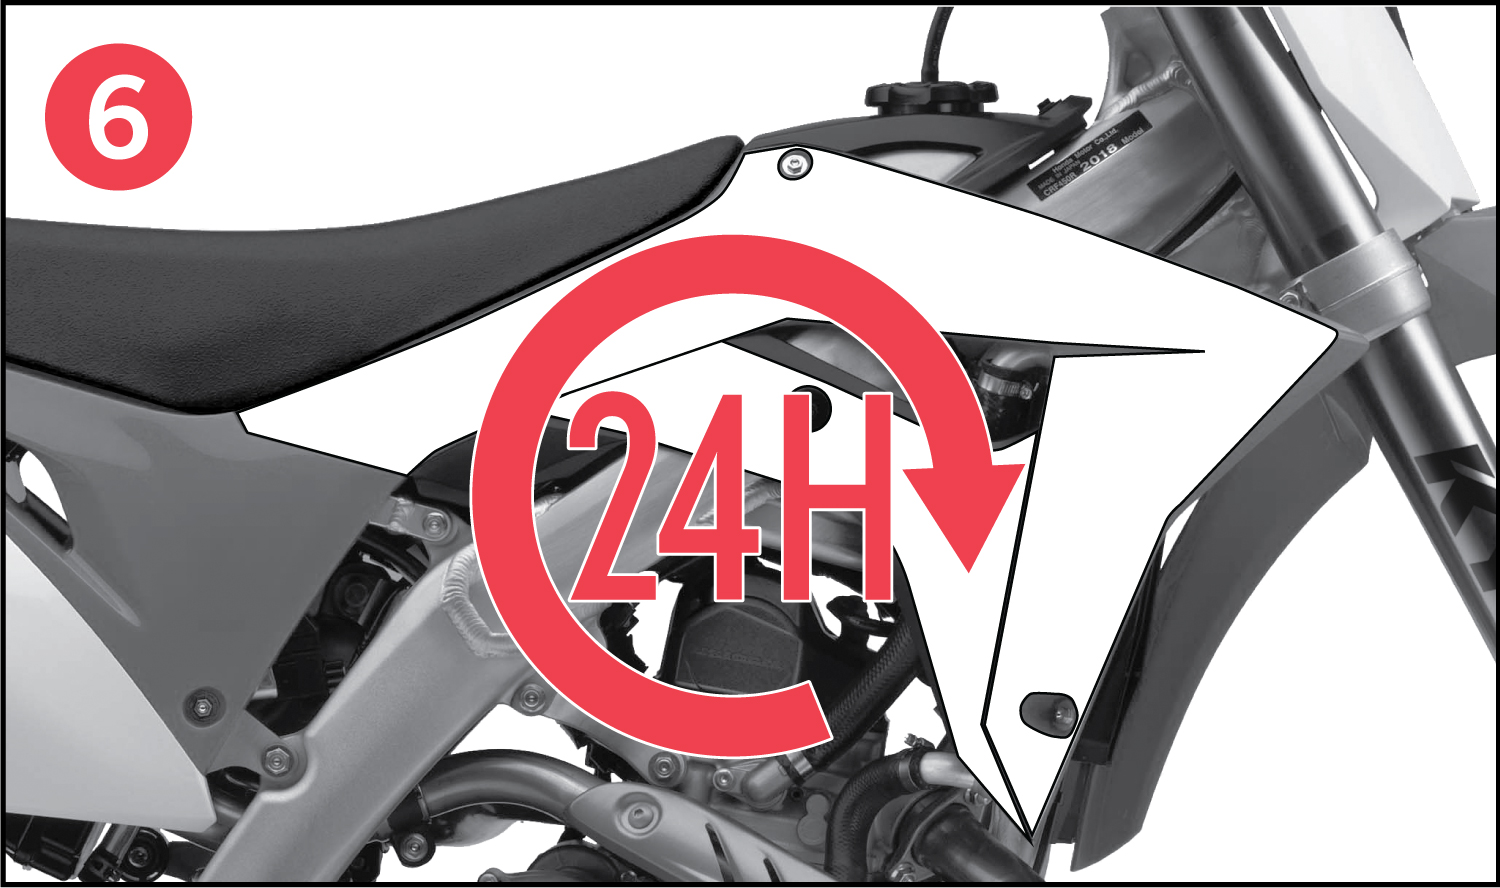
After the decal is 100% applied, wait 24 hours to allow the material to settle. Then inspect all the edges for proper adhesion. If any wrinkles are present, use light heat to press back down. If bubbles are present, pull back the decal to the area with the bubble and re-apply with light heat.
Note: Some areas of the body work are more difficult to install due to the extreme curvature of the plastic. Some of our decals have been engineered with relief cuts to make installation easier for you. The graphics should align correctly once the decal has been properly installed
SEAT COVER INSTALLATION
Tools Needed: flat blade screwdriver or staple remover, pliers, X-acto knife, air or electric staple gun with 1/4″ or 6mm staples
1. Remove old seat cover by removing staples with flat blade screwdriver or staple remover. Use pliers to pull out staples if necessary. Safety glasses are recommended.
2. Make sure new seat cover is at an optimum temperature of 70ºF- 90ºF (21ºC- 32ºC). When installing. If needed use hair dryer or heat gun at a low setting to bring the seat to optimum temperature.
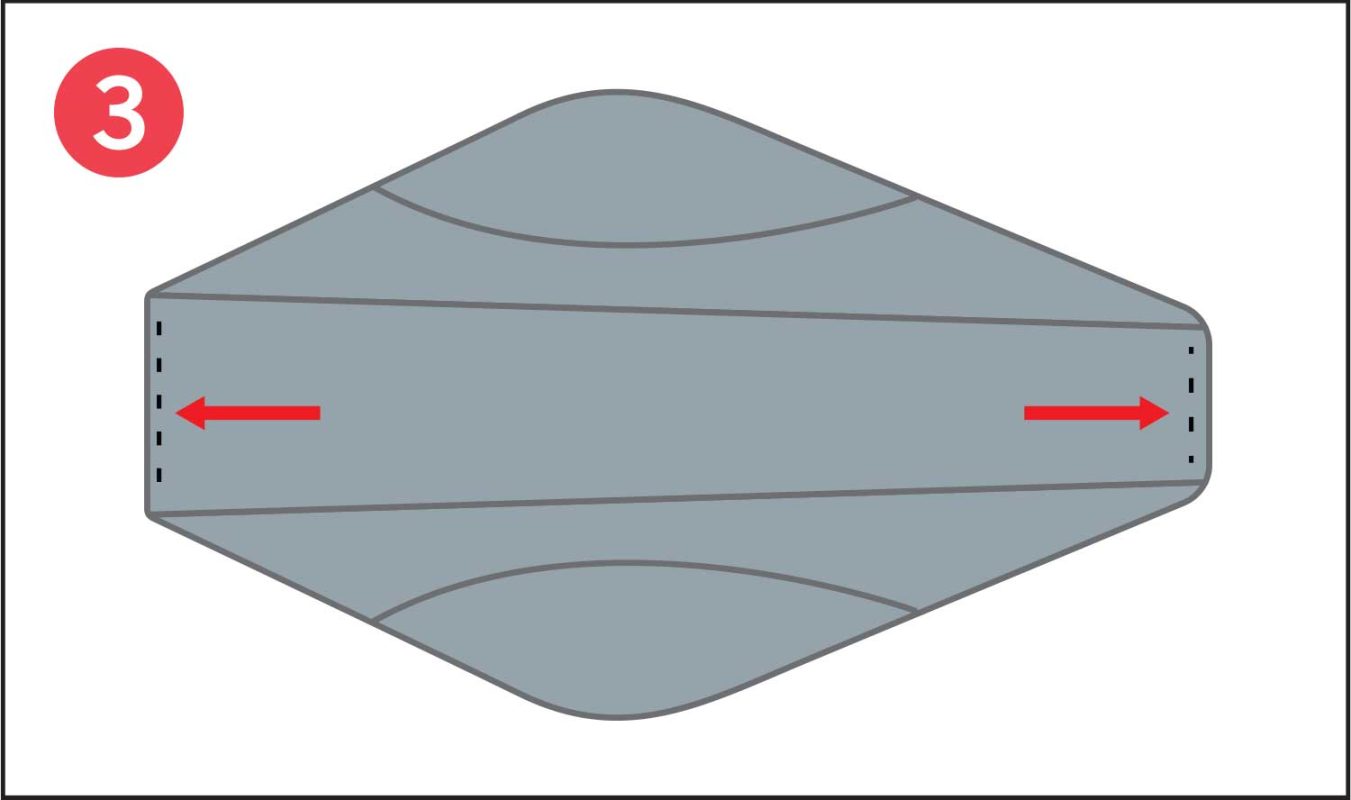
First pull the seat cover over the front of the foam and then over the back, aligning the center of the seat cover with the foam. Staple front and back with 2-3 staples only and re-check alignment.
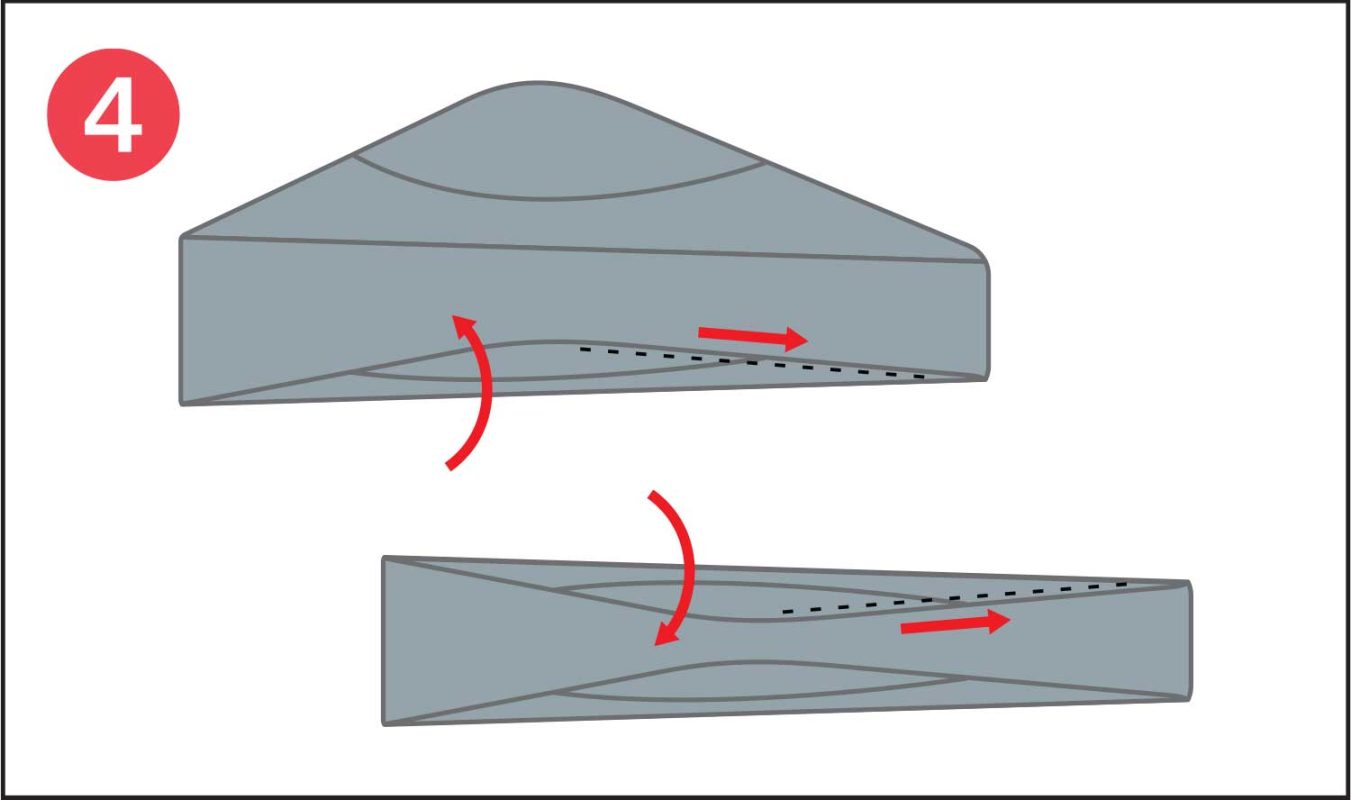
Next stretch the sides over the knee area located at the bend of the base and staple. Continue to stretch and staple the front section from the knee area to the top evenly.
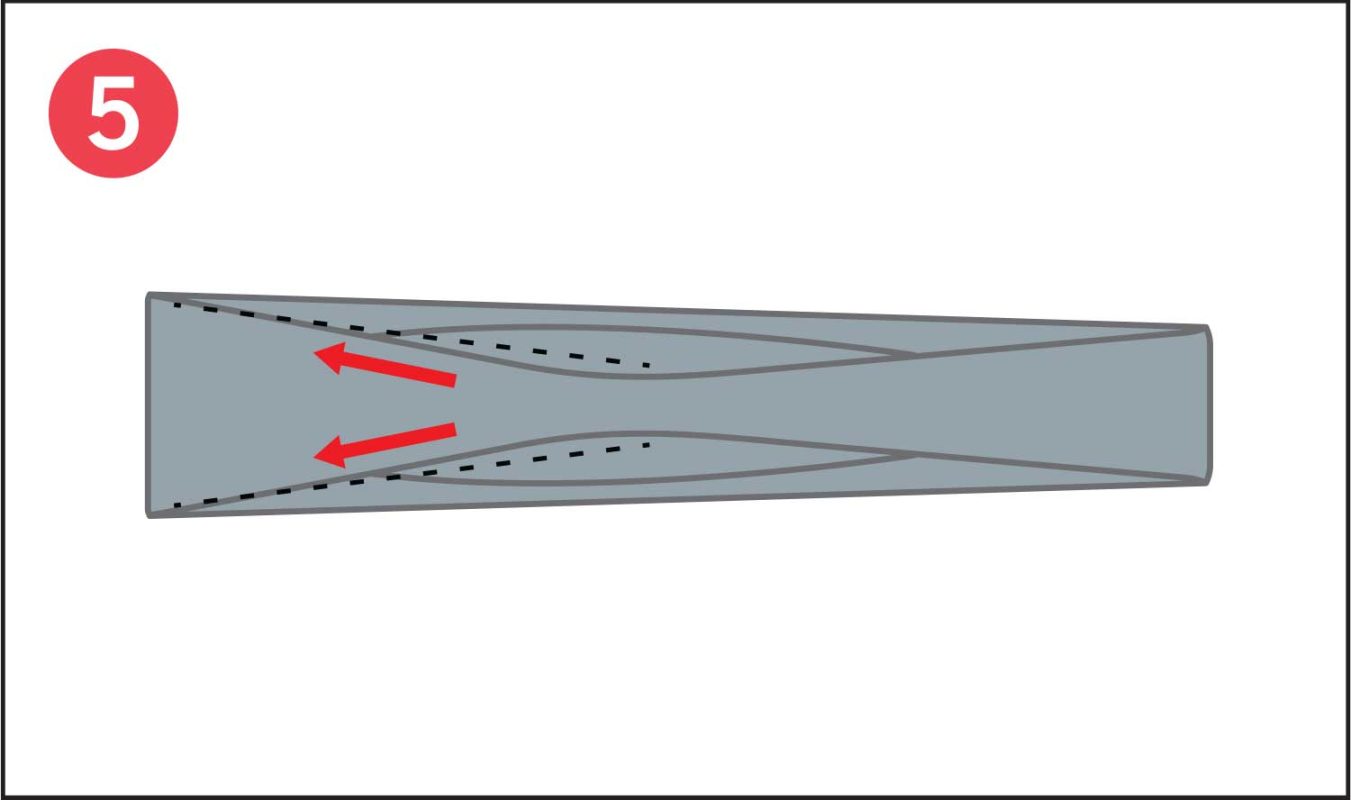
Repeat this process from the knee area to the back. If there are still wrinkles in the seat, remove staples from that area to stretch and re-staple.
6. Finish installation by placing staples 1/2″(1.27cm) apart on the front, back, and knee area and 1″(2.54cm) apart along the sides. Finally, trim excess material with X-acto knife around seat mounts, front, back and sides.